

How To Repair Galvanized Water Pipe Leaks
Cease Leaks in Plumbing Joints
Foolproof methods for connecting valves, faucets and sinks, and drain parts.
Introduction
The best time to fix a plumbing leak is before information technology happens, by properly connecting water supply and waste line fittings. Learn the tricks that pros use to make leakproof connections.
Tools Required
Materials Required
- Flexible supply tubes
- Teflon pipe joint chemical compound
- Teflon tape
Project stride-by-step (11)
Footstep 1
Employ two types of Teflon pipe joint compound on threaded joints
Wrap threads with plumbers tape
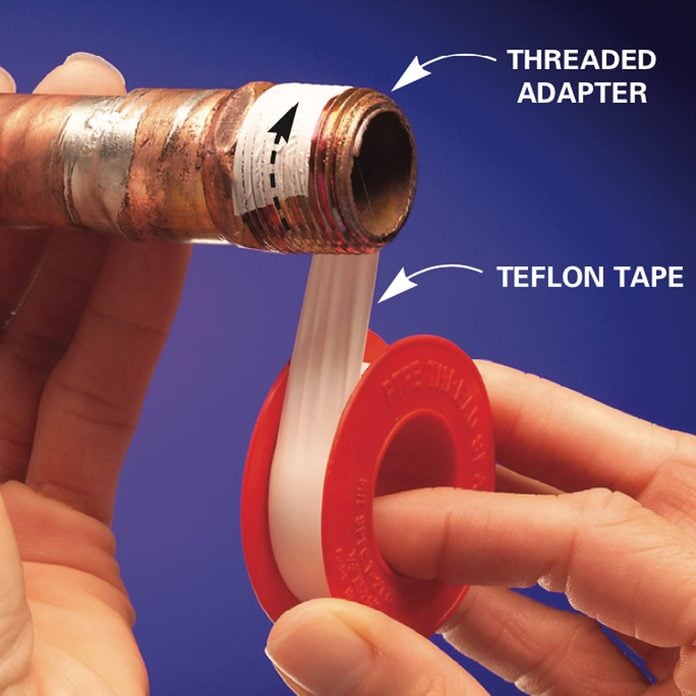
Wrap the plumbers record around the pipe clockwise.
How to Ready a Dripping Shower
![]()
Step 3
Tighten the connexion
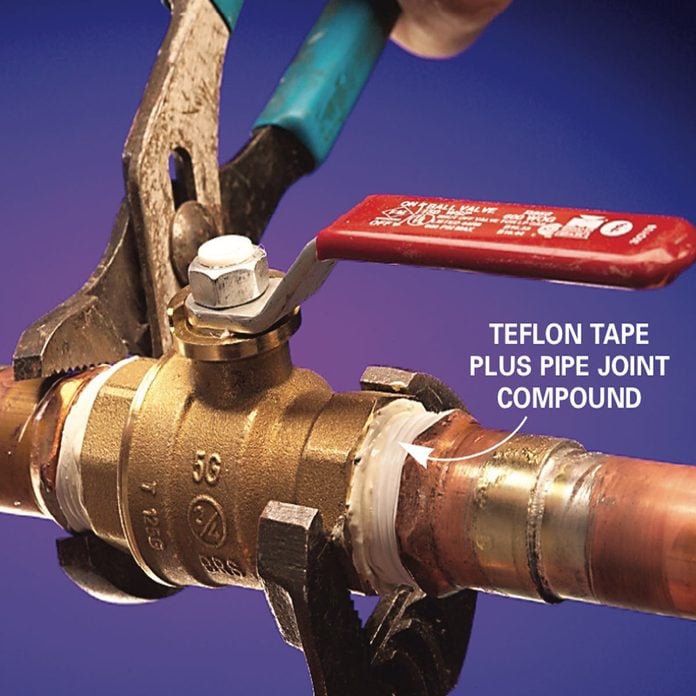
Using two wrenches, tighten the connexion over the joint compound and plumbers tape.
Why employ plumbers tape and pipe joint compound
Connections that rely on threaded pipes and fittings are prone to leaks if they're non sealed with either Teflon tape or Teflon pipe joint compound. Careful plumbers use both pipage joint chemical compound and teflon on every joint for extra security. They don't desire to come dorsum.
Start by wrapping the male threads with Teflon tape (Photo 1). With the end of the threaded pipage facing you lot as shown, wrap the plumbers record clockwise. Unremarkably 3 layers is enough. Once in a while, you'll run into a loose plumbing fixtures that requires four or 5 wraps. Stretch and tear the tape to complete the wrap.
Spread a thin layer of Teflon pipe articulation chemical compound over the record (Photo 2). If you're working with plastic pipe, choose Teflon piping joint compound that's compatible with information technology. So get-go the threads past hand before tightening the connection with wrenches (Photo three). Wipe away the excess pipe joint compound.
Well Pump Troubleshooting and DIY Repair
Step iv
Lubricate the ferrule on compression joints
Wipe piping joint chemical compound
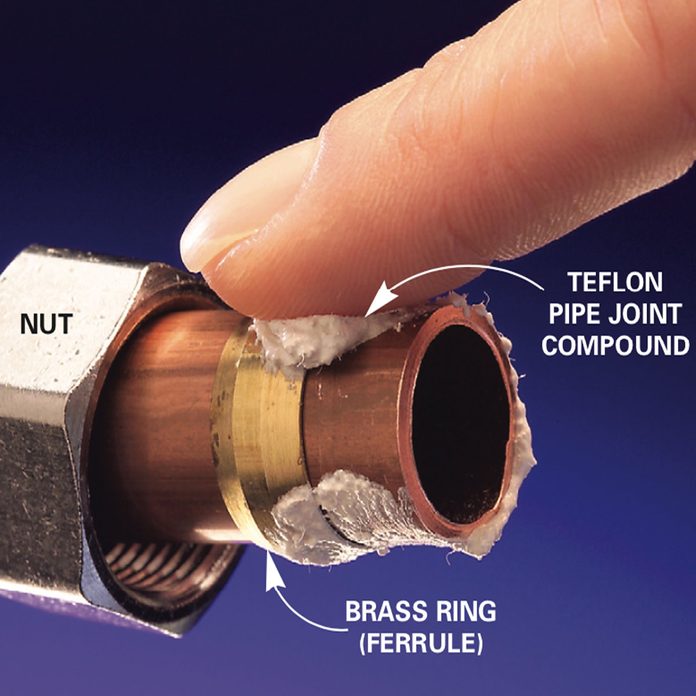
Lubricate the ferrule and brass ring with pipe joint compound.
Handy Plumbing Tips and Tricks
Stride vi
Tighten the plumbing equipment
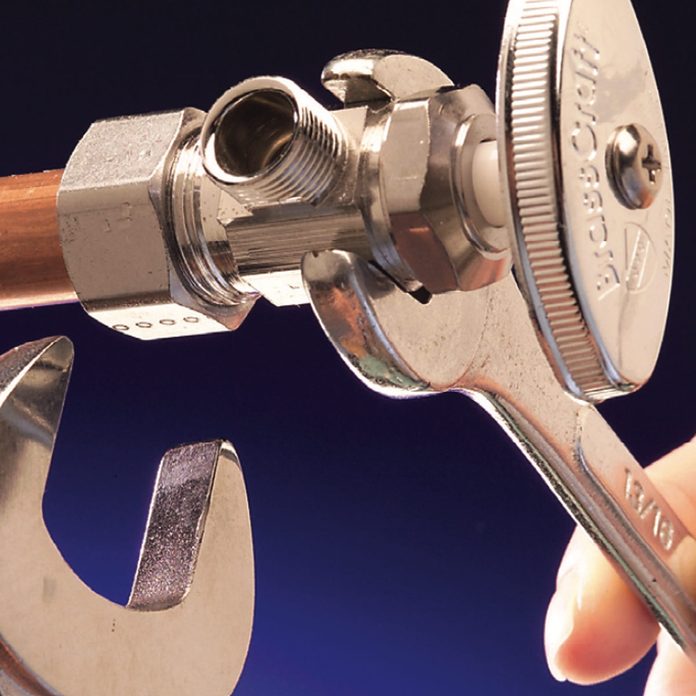
Tighten the compression plumbing equipment. The pipe joint compound provides a greater margin of safety. Compression joints are most common on shutoff valves, although you find them on other fittings besides. They take a brass or plastic ring (ferrule) that's compressed into a recess when you tighten the nut, forming a seal. Lubricating the pipe and the ferrule with a chip of Teflon pipage joint compound (Photograph i) helps the ferrule slide along the piping and clasp tightly into the recessed fitting with less wrench pressure (Photo 2). Tighten compression fittings firmly with ii wrenches to crimp the ferrule onto the pipe (Photograph 3). Also brand sure the piping or tube goes straight into the fitting. Misalignment will cause a leak. If the fitting leaks after you lot turn on the water, try tightening the nut an additional one-quarter turn. This usually stops the leak.
Step eight
Assemble and align
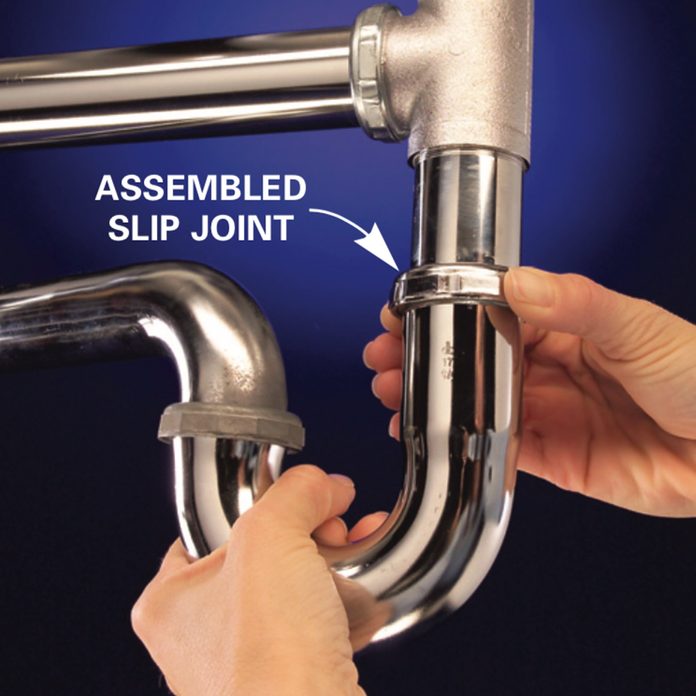
Hand-tighten all the joints, then align and lock the pipes in position with a slip articulation pliers
Joints on chrome trap assemblies rely on safe skid joint washers for the seal, which ofttimes leak. If y'all're reassembling a chrome trap, buy new slip joint washers and nuts. However, new washers sometimes stick to the pipe, causing them to twist or distort equally y'all push them tight with the slip joint nut. To avoid this, lubricate the drain tubing and slip articulation with a little pipe articulation compound (Photo 1). The compound helps the washer slide smoothly and creates a tighter seal.
Start the slip joint nut past hand, and twist it on until the threads are engaged correctly. Hand-tighten all joints starting time (Photo ii). Then conform the trap parts until they're aligned and pitched slightly for drainage. This is key; a misaligned joint will leak, even with new washers. Finally, use a large slip joint pliers to tighten the nuts an additional half turn.
Plastic trap parts use hard plastic slip joint washers for a seal. Make certain the flat part is against the nut with the tapered side facing the fitting.
12 Things Your Plumber Doesn't Want You To Know
Step 9
Cull flexible supply tubes
Solid copper supply lines
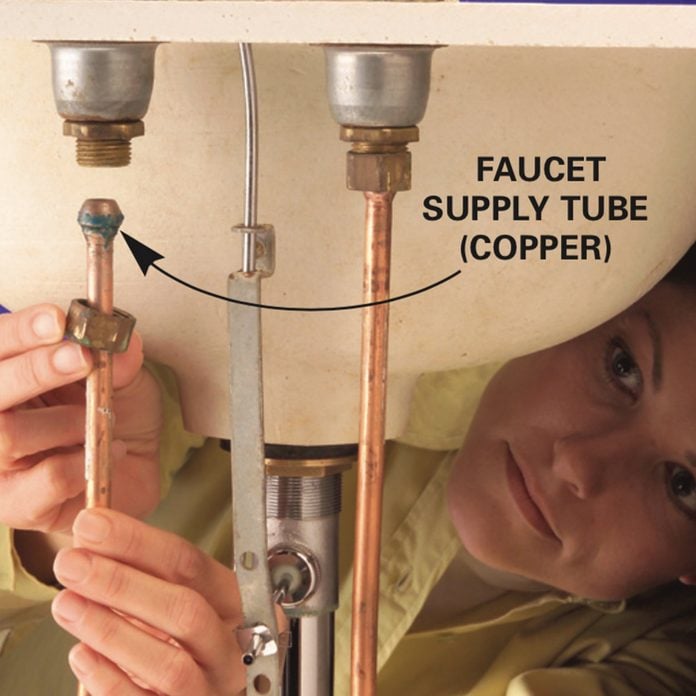
Avert solid copper or chrome supply lines. They're difficult to get right unless you've had lots of feel with them.
12 Things Your Plumber Wants Y'all To Know
Step xi
Shut-up of gasket
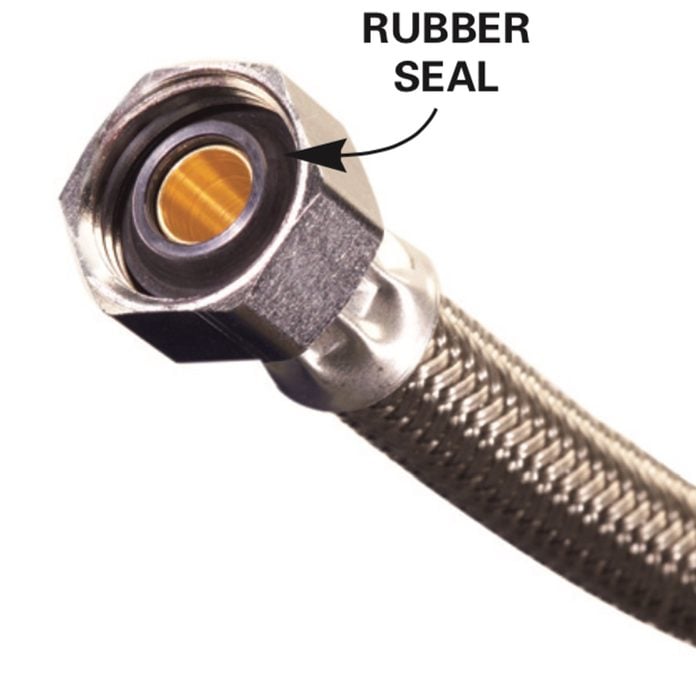
Flexible supply lines utilise prophylactic gaskets to seal the connections, and usually just demand hand-tightening plus half a turn with a wrench
The skinny copper or chrome supply tubes used to connect faucets and toilets (Photo 1) are catchy to cut, bend and marshal. Just you lot don't have to put up with them. When you're replacing a faucet or toilet, use flexible supply hoses with a braided roofing instead (Photograph 2). They have rubber gaskets at each end and don't require much forcefulness to seal. They're available in many lengths and are flexible plenty to fit almost whatsoever configuration. The merely trick is buying a connector with the right size nuts on the ends. Take your erstwhile tubing and the nuts on each end forth with you lot to the store to be sure of an exact match.
Start the nuts carefully and hand-tighten. Then tighten an additional half plough (Photo 2). Avert overtightening. It's easy to tighten the nuts a little more if the articulation leaks.
Discover and Repair Hidden Plumbing Leaks
Originally Published: March 21, 2022
Source: https://www.familyhandyman.com/project/stop-leaks-in-plumbing-joints/
0 Response to "How To Repair Galvanized Water Pipe Leaks"
Post a Comment